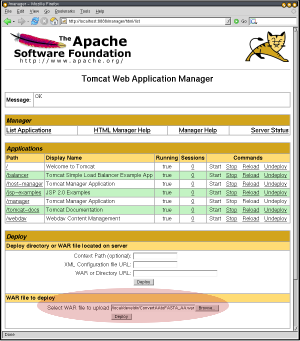
 1. Specification of WAR Upload |
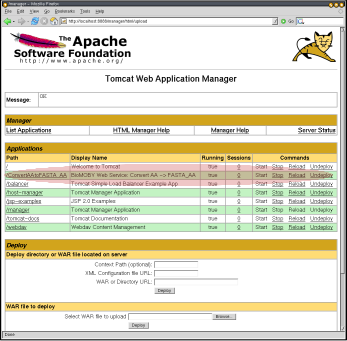 2. Successful deployment |
This tutorial explains (with a start-to-finish example of a meaningful service) how to become a provider of a MOBY service. It should take you less than 30 minutes. The approach is based on extending a base jMOBY Servlet, but does not require you to have any knowledge of Servlets, SOAP, XML, RDF or any of the other technologies underlying its implementation. You do not need to checkout the jMOBY CVS, or install Apache Axis. Alternatively, you can do this tutorial without Apache Ant too.
For scientific publications using this methdology, please cite this paper
If, on the other hand, you are planning on directly hacking the jMOBY classes, the other approach to developing services (using a code generator and the full jMOBY CVS) can be found in this document.
The following should be (pre-)installed:
You need to tell Ant where your code and servlet container are located. This is done by modifying the
mobyService.properties file you just downloaded, customizing it for your site:
# Where the Java source directory is located (relative to project.dir).
src.dir=src
# Where any and all 3rd party libraries for your code are stored (relative to project.dir).
lib.dir=lib

# The package-qualified location of your main class's source code (the one extending MobyServlet).
main.class.file=org/biomoby/service/test/ConvertAAtoFASTA_AA.java

# Name of the output WAR archive to be generated (will also be the servlet name).
my.servlet.war.file=ConvertAAtoFASTA_AA.war

# The location of a test MOBY XML input data file (used as input to test your service).
input.data.file=${project.dir}/mobyAASeq.xml

# Your Java Servlet host URL (with port)
servlet.host.url=http://moby.ucalgary.ca:8089
|
MobyServlet takes care of all of the protocol
issues for you, all you need to do is override the
business logic method: processRequest
For example, the following service consumes a MOBY AminoAcidSequence object called "inseq", and returns it reformatted into a MOBY FASTA_AA object called "outseq":
package org.biomoby.service.test; // This could be any package you want in real life...

import org.biomoby.shared.MobyDataType;
import org.biomoby.shared.data.*;
import org.biomoby.service.*;

@mobyService(name="ConvertAAtoFASTA_AA",
             type="FormatConversion",
	     provider="moby.ucalgary.ca",
	     author="gordonp@ucalgary.ca",
	     in={"inseq:AminoAcidSequence"},
	     out={"outseq:FASTA_AA"},
	     description={"Converts amino acid objects into FastA formatted records, ",
			  "primarily to increase inter-service compatibility"})

public class ConvertAAtoFASTA_AA extends MobyServlet{

    public void processRequest(MobyDataJob request, MobyDataJob result) throws Exception{
         // The input parameter for this method is registered as "inseq"
         MobyDataComposite aaSeqObject = (MobyDataComposite) request.get("inseq");

         // SequenceString is a member of incoming AminoAcidSequence object
         MobyDataString aaStringObject = (MobyDataString) aaSeqObject.get("SequenceString");
         String aaString = aaStringObject.toString();

         // Do the reformatting (divide seq into 50 char chunks per line)
         String fastaString = ">" + aaSeqObject.getId() + "\n" +
                              aaString.replaceAll("(.{1,50})", "$1\n");

         MobyDataType fastaType = MobyDataType.getDataType("FASTA_AA");
         MobyDataComposite fastaObject = new MobyDataComposite(fastaType,
                                                               aaSeqObject.getPrimaryNamespace(),
                                                               aaSeqObject.getId(),
                                                               fastaString);

         // Set the result that will be passed back to the client
         result.put("outseq", fastaObject);
    }
} |
Save a file with the code above in a file called
${src.dir}/org/biomoby/service/test/ConvertAAtoFASTA_AA.java
Notice the @mobyService line. This is a Java
annotation used by
the base MobyServlet to do all the input type checking for you. If you've specified the annotation
correctly, you are guaranteed that processRequest will only receive syntactically
and semantically valid data. The same annotation is eventually used to publish your service's meta-data to
MOBY Central. If want to specify secondary parameters for a service,
look here for the syntax
That's it for the coding. Really! Now compile it (Ant will automatically fetch the
MobyServlet.war you are extending), running the following command in the same
directory where you saved the build.xml file:
ant compile
When you go to write your own services with different data types, a quick tutorial on the data API can be found here. All of the datatypes, service types and namespaces you use must be registered in the MOBY Ontologies. Also, when you go to create your own services, you'll put the Java code in a directory that matches a package name of your own choosing (e.g. ${src.dir}/org/foo/bar.java, or just ${src.dir}/foo.java for no-package code)
You should probably test that your business logic works! The base servlet has a built-in application test, so just type:
and make sure the output is as you expected.ant test
The default MobyServlet.war business logic is to just return blank MOBY messages.
You've got to customize it as your new WAR file with the following:
ant war
The resulting ConvertAAtoFASTA_AA.war is in the build directory you specified in Step 1.
ConvertAAtoFASTA_AA.war now contains your MOBY-S Web Service, and is ready to be deployed
in the Servlet container. How you do this depends on the container. For Tomcat, the easiest way is to use
the management Web interface (e.g. http://your.servlet.host:8080/manager/html, but change 8080 appropriately
if you had to follow Step 0) and upload the WAR.
1. Specification of WAR Upload |
2. Successful deployment |
| Servlet Container | Where to put ConvertAAtoFASTA_AA.war | Further action |
|---|---|---|
| Tomcat | $CATALINA_HOME/webapps | Restart Tomcat |
| WebLogic | $WEBLOGIC_HOME/config/mydomain/applications | Nothing, it loads the WAR automatically |
| JBOSS | $JBOSS_HOME/server/default/deploy | Nothing, it loads the WAR automatically |
You should test your service to make sure it works in the servlet environment. A testing client program is automagically included in your WAR, so type:
ant testService
If the service fails, a useful error message should be printed to help you diagnose the problem.
This would usually be because the data type you return isn't what you declared
(this is the first occasion your output is thoroughly checked).
If you get a java.lang.NoClassDefFoundError, please
let me know (gordonp @
ucalgary.ca) and I'll try to help you:
class paths for servlets can be tricky.
Finally, if the output looks reasonable (no errors or faults, a real object is returned), you're ready to register your service with MobyCentral so anyone can use it:
ant registerService
This will test the service to make sure it works, then register it with MOBY Central. You'll see the message "Service Successfully Registered!".
Once it's registered, try loading the example
data file from before (i.e. mobyAASeq.xml) into Seahawk
using the file/URL load icon on the toolbar ( ).
Click the "AminoAcidSequence" hyperlink, and your service will now appear (under the Conversion
menu) as a service option!
).
Click the "AminoAcidSequence" hyperlink, and your service will now appear (under the Conversion
menu) as a service option!
Since it isn't useful for everyone who uses this tutorial to host this service, please unregister it now with the following command:
ant unregisterService
You should get "Service Successfully Unregistered!" if it worked.
Permanent services: When you want to deploy your own, permanent service, simply run instead:
Your service hosts its own RDF specification (retrievable by doing a GET on the servlet URL). An automated agent at MOBY Central retrieves that RDF a few times a day, and if it fails to retrieve it several times in a row, the service is automatically deregistered. Therefore, if you stop or undeploy your servlet for a few days, it will automatically be deregistered. This "passive" deregistration method is for security purposes: no one can (intentionally or accidentally) deregister the service except those who control the servlet container itself.ant registerServicePermanent
Exceptions: Any exceptions or errors your code throws in processRequest will be caught, and included in the MOBY response. They are wrapped in a jMOBY ServiceException and will have the code INTERNAL_PROCESSING_ERROR, and severity level "error". Unless the exception thrown was a jMOBY ServiceException already, in which case the exception is used as-is. Warnings and information can be added without halting the program flow using addException(ServiceException). This example program demonstrates both fatal and non-fatal exceptions.
Performance:
The first call to the service may take a while, but subsequent calls should be considerably
faster because the container has all the classes loaded, and the servlet has cached all the ontologies.
For example, the basic MobyServlet
service call can take about 15 seconds at first, then about 1 second afterwards (using Tomcat).
Updating your service (permanently registered ones): If you need to change your code, simply repeat steps 2, 3 and 4 (plus testing, of course). You do NOT need to register the service, even if you changed the inputs and outputs! This is because MOBY Central's agent will read the new RDF description the Servlet generates. It might take a day or so.
Syncing with MOBY Central: Your service downloads the MOBY Central ontologies when started, therefore if you want your service to catch an important update to the ontologies, simply restart it (e.g. the "reload" link in the Tomcat manager interface shown previously).
Using a different MOBY Central: By default, the annotation assumes that the default public Moby Central will be used (this is determined automagically by a combination of hardcoding and fetching info from biomoby.org). If you want to use a different Moby Central, e.g. a test registry, add the centralEndpoint string to the annotation.
Moving Your Service:
The WAR you've built is completely self-contained, therefore you should be able to move your service
simply by copying the WAR to another servlet container. You can e-mail it to your friends, so they can
mirror the service, or extend it! The only restriction is that the mobyService annotation's
provider parameter must be changed in the code if more than one copy of the service is to
be registered (since the "serviceAuthURI:serviceName" combination is a service key in MOBY Central).
Alternatively, you can override the annotation manually, by uncommenting the override parameters in the WAR's
WEB-INF/web.xml file.
Servlet Initialization:
The best way to do any initialization (e.g. database connections) is to override the init()
method, being sure to call super.init() first, of course. The thisService variable is not
intialized until the first GET or POST to the service.
If you for some crazy reason create a constructor method, you must provide a working
nullary (no parameter) constructor too. Be sure to free any system resources you allocate in
init() by overriding the destroy() method too. It is called when a servlet
is being stopped.